Thursday, August 13, 2015

[LibreOffice Calc] One word, one cell

C: 29th July 2015M, We / 13 Syawal 1436H, We. [Ubuntu 14.04]
P: 13th Aug 2015M, Th / 28 Syawal 1436H, Th. [Ubuntu 14.04]
U:


Assalamualaikum warahmatullah. Imagine there are strings and strings of words. In LibreOffice Calc, what i want is for:
(i) one word to go into one cell,
(ii) the word-containing cells to be arranged vertically (instead of horizontally), and
(iii) those word-containing cells to take-up only one column (instead of multiple columns).

That arrangement is useful for word-by-word translating exercise which at the same time preserves the word sequence. So you can either read left-to-right or top-to-bottom. :)

There are three parts to this post:
- Part A: Copy-Paste from source to LibreOffice Calc
- Part B: Transpose in LibreOffice Calc
- Part C: The finished work

If you want to look around, start with Part C.


Part A: Copy-Paste from source to LibreOffice Calc

See Vid 1 which demonstrates Part A and Part B of this post.

Vid 1 - Overviews Part A and Part B of this post.


1. Select the chunks of text. See Pic 1.

Here's the link to the text in Pic 1:
https://www.facebook.com/zahazanmohamed/photos/10153016171783341/

Pic 1 - Screenshot taken at 90% zoom.
Left: The text.
Right: The text, selected.


2. Press the Ctrl+C keyboard keys to copy the chunk of text.


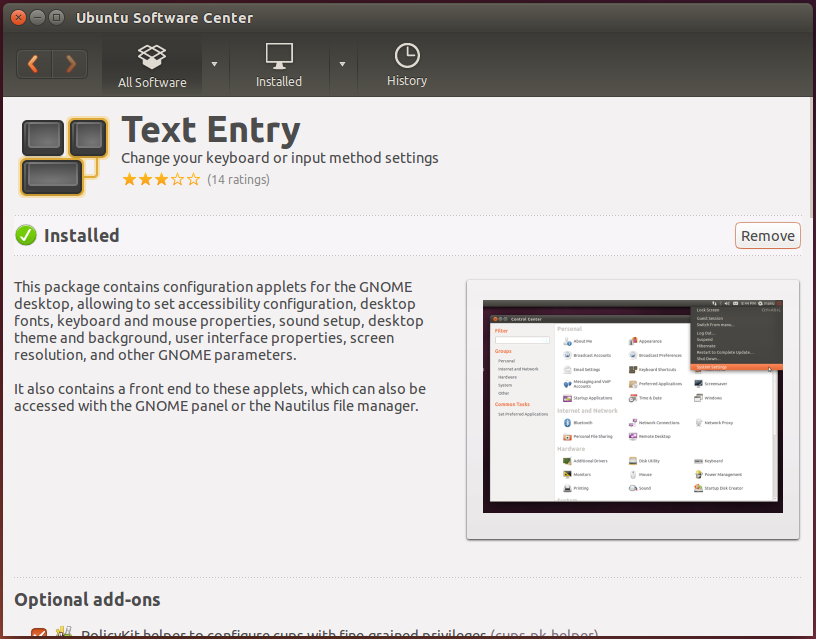
3. Run LibreOffice Calc.

i. Click the Dash Home icon in the Launcher.
ii. In the search field, type in: calc.
iii. Click the LibreOffice Calc icon.

See Pic 2.

The LibreOffice Calc window will appear. See Pic 3.

Pic 2 - Starting LibreOffice Calc.


Pic 3 - The LibreOffice Calc window once loaded.


Pic 4 - The LibreOffice version.


4. Right-click a cell.

In the right-click menu, left click Paste Special... .

See Pic 5.

Pic 5 - The right-click menu.


5. In the Paste Special dialog box:
(i) select Unformatted text, then
(ii) click the OK button.

See Pic 6.

Pic 6 - The Paste Special dialog box.


6. In the Text Import dialog box:
(i) in the Separator Options section, select Separated by,
(ii) put a tick mark in the appropriate box (in my case: Space), and
(iii) click the OK button.

See Pic 7.

See how the imported text looks in Pic 8.

Pic 7 - The Text Import dialog box.


Pic 8 - The imported text.


Part B: Transpose in LibreOffice Calc

Credit for the Transpose info:
http://www.excelforum.com/excel-general/674001-excel-importing-text-file-as-one-long-row.html#post2052280


7. Add a new sheet by clicking the green plus icon. See Pic 9.

The icon is at the bottom of the LibreOffice Calc window, near to the left. See Pic 3.

Pic 9 - The green plus icon icon.


Vid 2 - Shows Step 8 to Step 12.


8. Select the first row of text from Sheet1 (the sheet you used in Step 4).


9. Press the Ctrl+X keyboard keys to cut the row of selected text.

Or if you want to keep the original, you can use Ctrl+C to copy the row of selected text. As i probably don't need the original, i cut the text straightaway.


10. Go to Sheet2 (the sheet you added in Step 7).


11. Right-click a cell where you want the text to start vertically.

In the right-click menu, left click Paste Special... .

See Pic 5.

In my case, i want it to start from cell A2.


12. In the Paste Special dialog box:
(i) in the Options section, put a tick mark in the Transpose box
(ii) then click the OK button.

See Pic 10.

The selected text in Step 8 will be arranged vertically in column A. See Pic 11.

Pic 10 - The Paste Special dialog box.


Pic 11 - The transposed text.


13. Repeat Step 8 to Step 12 for the rest of the text.

Sorry, i don't know how to do it in one go, or automatedly.


Part C: The finished work

The finished work in LibreOffice Calc is shown in Pic 12.

One of the page of the finished work is shown in Pic 13.

The whole document is shown in PDF 1.

Pic 12 - Screenshot of the finished work in LibreOffice Calc.
- Column A: #. Item numbering.
- Column B: Bahasa Arab. The Arabic text.
- Column C: Transliterasi. The transliteration.
- Column D: Bahasa Melayu. The Malay translation.
- Column E: Nota. Notes.


Pic 13 - One of the page of the finished work.
The page was converted from PDF to PNG using GIMP.
Refer to PDF 1 for the latest version of the whole document.


PDF 1 - The whole document of the finished work.
Obviously i need to put more effort into my Arabic. (^_^!)


Alhamdulillah.

Wednesday, April 15, 2015

Keyboard input for Japanese Hiragana (Ubuntu 14.04)

C: 10th April 2015, Fr / 20 Jamadilakhir 1436H, Ju. [Ubuntu 14.04]
P: 15th April 2015, We / 26 Jamadilakhir 1436H, Kh. [Ubuntu 14.04]
U: 15th April 2015, We / 26 Jamadilakhir 1436H, Kh. [Ubuntu 14.04]

Pic 1 - Really? Hontouni in hiragana.


Assalamualaikum warahmatullah.

Some things in this post:
Keyboard input for Japanese Hiragana and Chinese Pinyin
http://ubuntudigest.blogspot.com/2012/09/keyboard-input-for-japanese-hiragana.html

... have changed since last. Instead of fixing and correcting here and there to update that old post, I'll leave the post as it is and incorporate those modifications in this post. Activities in this post were performed on Ubuntu 14.04 Trusty Tahr. See Pic 2.

There are 5 parts to this post:
- Part A: Text Entry package
- Part B: Setup
- Part C: Testing
- Part D: Other input sources
- Part E: What is...

Pic 2 - Ubuntu 14.04 LTS.


Part A: Text Entry package

I'm not sure when or why i had this package installed.

If you already have this package installed, skip ahead to Part B.


1. Run Ubuntu Software Center.

i. Click the Dash Home icon in the Launcher.
ii. In the search field, type in: ubuntu software center.
iii. In the list of filtered results, click the Ubuntu Software Center icon.

See Pic 3.

The loaded Ubuntu Software Center will look something like Pic 4.

Pic 3 - Ubuntu Software Center in the list of filtered Applications.


Pic 4 - The Ubuntu Software Center, loaded.


Pic 5 - The Ubuntu Software Center version.


2. Search for the package.

In the search field of Ubuntu Software Center, type in: text entry.

The list will auto-filter.

See Pic 6.

Pic 6 - Searching for the Text Entry package in Ubuntu Software Center.


Pic 7 - Package description for the Text Entry package.


3. Install the package.

i. In the list of auto-filtered packages, click the package:
Text Entry
Change your keyboard or input method settings
See Pic 6.

ii. Then, either:
(a) click the Install button to straight-away install the package. Or,
(b) click the More Info button to read the package description and/or install optional add-ons. See Pic 7. Later, click the Install button.

iii. In the Authenticate dialog box, type-in your password in the password field, then click the Authenticate button. See Pic 8.

Once installed, the Install button will change into the Remove button.

You can close Ubuntu Software Center after installation is completed.

Pic 8 - The Authenticate dialog box.


Part B: Setup

4. Running the program that manages the text input source.

i. Click the Dash Home icon in the Launcher.
ii. In the search field, type in: text entry.
iii. Click the Text Entry icon in the filtered results.

See Pic 9.

The Text Entry dialog box will appear. See Pic 10.

Pic 9 - Starting Text Entry.


Pic 10 - The Text Entry dialog box.


5. Adding a new input source.

In the Text Entry dialog box:
i. Click the + (plus) button. The Choose an input source dialog box will appear.
ii. In the Choose an input source dialog box, scroll to and click: Japanese (Anthy).
iii. Then click the Add button.

See Pic 11.

The Input sources to use in the Text Entry dialog box will list the newly added input source. See Pic 12.

Pic 11 - Adding the new input source.


Pic 12 - The Japanese (Anthy) input source added to the list in the Text Entry dialog box.


6. This step is just to show you the 'Hiragana part' about the newly added input source.

In the Text Entry dialog box:
i. Select the Japanese (Anthy) input source.
ii. At the bottom of the Input sources to use list, click the 'screwdriver and spanner' icon. See Pic 13.

The Setup - IBus-Anthy dialog box will appear. See Pic 14.

In the Setup - IBus-Anthy dialog box, under the General tab, in the Initial Setting section, you will see: Input Mode: Hiragana. That's what i wanted to show. You can now close this dialog box.

Pic 13 - The 'screwdriver and spanner' icon in the Text Entry dialog box. It's besides the 'keyboard' icon.


Pic 14 - The Setup - IBus-Anthy dialog box.


7. Switching between input sources.

You can switch between input sources using either (a) the menu bar, or (b) keyboard shortcuts.

You don't actually have to choose between (a) or (b). You can use both -- display the input source in menu bar and change between input sources using the keyboard shortcuts.

(a) Menu bar.

In the Text Entry dialog box, at the bottom left, put a tick in the Show current input source in the menu bar tick-box. See Pic 15.

Instantly you will see a change in the menu bar. See Pic 16 (without tick), and Pic 17 (with tick).

Later when you need to switch between input sources, simply click the Text Entry shortcut in the menu bar and select the input source of your choice. See Pic 18.

Pic 15 - The Show current input source in the menu bar tick-box, from the Text Entry dialog box.


Pic 16 - The Text Entry shortcut is absent in the Menu bar because a tick is absent in the Show current input source in the menu bar tick-box.


Pic 17 - The Text Entry shortcut is present in the Menu bar because a tick is present in the Show current input source in the menu bar tick-box.


Pic 18 - The input sources listed under the Text Entry shortcut in the menu bar.


(b) Keyboard shortcuts.

You have to know the keyboard shortcuts which are listed on the right of the Text Entry dialog box. See Pic 19. You can change these shortcuts if you have to.

The Super key is the keyboard key with the Windows logo... at least it is on mine :)

Later when you need to switch between input sources, simply press the according keyboard keys sequence.

Pic 19 - Keyboard shortcuts to switch between input sources, from the Text Entry dialog box.


You can now close the Text Entry dialog box.


Part C: Testing

This part is to test the newly added input source.

If setting-up is all you need and you've completed Part B, you can safely skip the rest of this post.

At the same time carrying out the steps in this part, do refer to Vid 1.

Vid 1 - Trying out hiragana in gedit (a text editor).


8. Open a text editor.

I use gedit.

Pic 20 - The gedit version.


9. Change the input source to: Japanese (Anthy).

If you seem lost, see Step 7 on how to setup and/or change the input source.


10. In the text editor, type-in this romaji:
hontouni

If you want to accept the hiragana (ほんとうに), press the Enter key.

If you want to change the newly typed text to kanji (本当に), press the Space bar key once.

If you want to change the newly typed text:
i - press the Space bar key twice,
ii - select the entry you want, then
iii - after the changes are complete, press the Enter key.

After you are done typing, remember to change the current input source back to your usual input source. :)


Part D: Other input sources

11. These are the other input sources setup on my laptop:

(a) Arabic (qwerty/digits)

See Pic 21.

This i use for both Arabic and Jawi.

Pic 21 - The Arabic (qwerty/digits) input source.


(b) Chinese (Pinyin)

See Pic 22.

Pic 22 - The Chinese (Pinyin) input source.


12. Rearranging the input sources.

In the Text Entry dialog box, use the 'up-down arrowheads' icon to rearrange the input sources. See Pic 23.

The order in the menu bar (see Pic 25) will automatically follow the order in the Text Entry dialog box (see Pic 24).

Pic 23 - The 'up-down arrowheads' icon in the Text Entry dialog box.


Pic 24 - The rearranged order of input sources in the Text Entry dialog box.


Pic 25 - The rearranged order of input sources in the menu bar.


Part E: What is...

(a) What is Anthy?

The mention of Anthy (in Step 5.ii of this post) started way back in the older post.

Anthy
http://en.wikipedia.org/wiki/Anthy


(b) What is "hontouni"?

The romaji hontouni was mentioned in Pic 1 and Step 10 of this post.

For the meaning of the word, go here:
- http://jisho.org/words?jap=本当に;dict=edict
- http://beta.jisho.org/word/本当に

For a list of sentences using the word, go here:
http://jisho.org/sentences?jap=本当に

Thanks to my brother for suggesting these websites/webpages:
- Denshi Jisho — Online Japanese dictionary
http://jisho.org/

- What is On-reading and Kun-reading?
http://japanese.about.com/library/blqow43.htm

- How do you know when to use On-reading and Kun-reading?
http://japanese.about.com/library/blqow44.htm


Alhamdulillah.

Thursday, February 12, 2015

[Kile] Error arising from \usepackage[latin]{babel}

C: 4th February 2015M, We / 14 Rabiulakhir 1436H, Ra. [Ubuntu 14.04]
P: 12th February 2015M, Th / 22 Rabiulakhir 1436H, Kh. [Ubuntu 14.04]
U:


Assalamualaikum warahmatullah.

The error is shown in Step 6.

There are three parts to this post:
- Part A: Backtracking:
- Part B: How to solve:
- Part C: For the curious minds:

This post was written while i was using Kile version 2.1.3 (see Pic 3) on Ubuntu 14.04.


Part A: Backtracking:

Replicating roughly what i did before running into the problem.

1. Assuming you already have Kile installed, run Kile. See Pic 1.

That is how Kile looks once loaded, see Pic 2.

Pic 1 - Starting Kile.


Pic 2 - Kile, loaded and empty.


Pic 3 - The About Kile dialogue box. Kile version.


2. Create a new *.tex file.

From the menu bar, click File > New. See Pic 4.

In the New File - Kile dialogue box, select:
i - Document Type: LaTeX Document
ii - Template: Empty File
iii - Click the OK button.
See Pic 5.

That is how a new *.tex file looks once created, see Pic 6.

Pic 4 - Creating a new *.tex file. Menu bar.


Pic 5 - Creating a new *.tex file. The New File - Kile dialogue box.


Pic 6 - A newly created *.tex file.


3. Copy the "complete example code" from here:
http://tex.stackexchange.com/a/226367

... and paste it into the newly created *.tex file.


4. Save the *.tex file.

From the menu bar, click File > Save As... . See Pic 7.

In the Save File - Kile dialogue box:
i - Give the *.tex file a location (Places), and
ii - a Name.
iii - Then click the Save button.
See Pic 8.

If you try to build the code without saving it first, Kile will prompt you to save the *.tex file:
[PDFLaTeX] Please save the untitled document first.
... and a Save File - Kile dialogue box will appear. See Pic 9.

Pic 7 - Saving the *.tex file for the first time. Menu bar.


Pic 8 - Saving the *.tex file for the first time. The Save File - Kile dialogue box.


Pic 9 - Prompt arising from building before the first save.


5. Build using your preferred engine. I used PDFLaTeX.

From the menu bar, click Build > Compile > PDFLaTeX. See Pic 10.

Pic 10 - Building the code using PDFLaTeX.


6. The following will take place:
i - this error will appear in the Log and Messages window, see Pic 11:
/usr/share/texlive/texmf-dist/tex/generic/babel/babel.sty:329:Package babel Error: You haven't specified a language option ...ry to proceed from here, type x to quit.}

ii - the babel.sty file will appear. See Pic 12.

iii - these will appear in the Output window: (you'll need to do some scrolling to find them)

(a) See Pic 13.
! Package babel Error: Unknown option `latin'. Either you misspelled it
(babel)                or the language definition file latin.ldf was not found.

(b) See Pic 14.
! Package babel Error: You haven't specified a language option.

The Log and Messages window and Output window are at the bottom of the Kile window. See Pic 6.

Pic 11 - Kile. Log and Messages.


Pic 12 - Kile. babel.sty.


Pic 13 - Kile. Output. (a)


Pic 14 - Kile. Output. (b)


7. The errors in Step 6 stems from this line of code in the *.tex file:
\usepackage[latin]{babel}

There is nothing wrong with this code. It's just that a required LaTeX package is missing.


8. I'm not sure if Kile:
- has an auto-update-after-installing-packages-while-Kile-is-running feature, or
- has an update-after-installing-packages-while-Kile-is-running button, or
- needs to be closed before installing any packages.

From the old days of using Windows *ahem*, i chose to terminate Kile before proceeding to Part B.


Part B: How to solve:

9. Run Ubuntu Software Center. See Pic 15.

That is how Ubuntu Software Center looks once loaded, see Pic 16.

Pic 15 - Starting Ubuntu Software Center.


Pic 16 - The Ubuntu Software Center.


Pic 17 - The About Ubuntu Software Center dialogue box. Ubuntu Software Center version.


10. Finding the package.

In the search field, type-in:
latex babel latin

The filtered packages will be auto-listed. See Pic 18.

Pic 18 - Ubuntu Software Center. Searching for the package.


11. Installing the package.

i - Select the package named, see Pic 18:
TeX Live: Other European languages
texlive-lang-european

ii - Either:

(a) - Click the More Info button to read the package description, then click the Install button. See Pic 19. Or,

(b) - Click the Install button to install straight-away. See Pic 18.


iii - The Authenticate dialogue box will appear. Key-in your Password, then click the Authenticate button. See Pic 20.

That is how your package looks once installed. See Pic 21.

Now Ubuntu Software Center can be closed.

Pic 19 - Ubuntu Software Center. The package description. Before installing.


Pic 20 - The Authenticate dialogue box.


Pic 21 - Ubuntu Software Center. The package description. After installing.


12. Run Kile. See Step 1.

I don't know how yours is setup. Mine loads the last document(s) that were open before Kile was closed.

If it doesn't load the code you saved in Step 4, from the menu bar, click File > Open Recent > then find your file in the list of recent files.

If your file is not in the list of recent files, from the menu bar, click File > Open... . In the Open Files - Kile dialogue box, locate your file then click the Open button.


13. Like in Step 5, build the code.

The error should be gone by now. See Pic 22.

Pic 22 - No more errors.


Part C: For the curious minds:

(a) The screenshot of the produced PDF, with the Step 7 code present (code was uncommented), is shown in Pic 23.

The screenshot of the produced PDF, with the Step 7 code absent (code was commented), is shown in Pic 24.


(b) The same document can be built using the XeLaTeX engine and the polyglossia package:

i - comment the Step 7 code. See Pic 25.

ii - add these lines in the preamble, see Pic 25:
(credit: http://tex.stackexchange.com/a/67962)
\usepackage{polyglossia}
\setmainlanguage{latin}

iii - then build the code using XeLaTeX. See Pic 26.

The screenshot of the produced PDF is shown in Pic 27.


Screenshots in Pic 23, Pic 24, and Pic 27:
- were taken at 60% zoom,
- shows the first page of the PDF, which is the table of contents (ToC).

Pic 23 - Screenshot of the produced PDF, with the Step 7 code present (code uncommented).


Pic 24 - Screenshot of the produced PDF, with the Step 7 code absent (code commented).


Pic 25 - Setting-up the code.


Pic 26 - Building the code using XeLaTeX.


Pic 27 - Screenshot of the produced PDF, with the code in Pic 25 present.


Alhamdulillah.